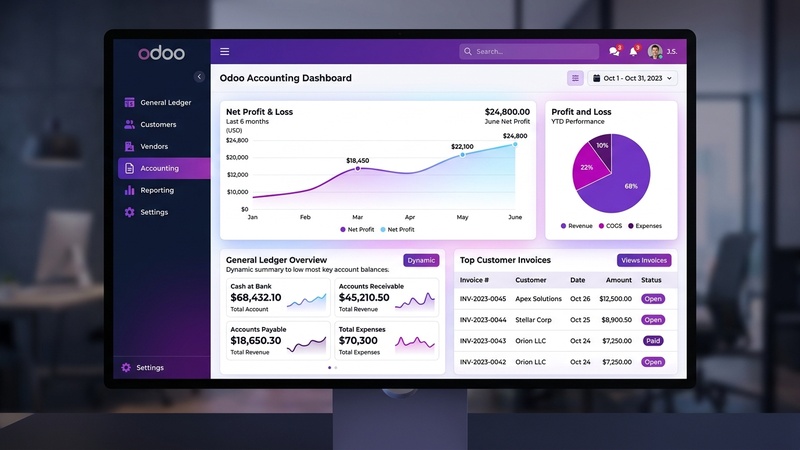

- Odoo Double-Entry Accounting Architecture
- Step 1: Fiscal Localization Package Setup
- Step 2: Designing & Importing Chart of Accounts
- Step 3: Configuring Accounting Journals
- Step 4: Setting Up Sales & Purchase Taxes
- Step 5: Customer Invoicing & Accounts Receivable (A/R)
- Step 6: Vendor Bills & Accounts Payable (A/P)
- Step 7: Analytic Accounting & Cost Centers
- Step 8: Financial Reporting & Audit Trail
1. Odoo Double-Entry Accounting Architecture
Odoo Accounting operates strictly on real-time double-entry bookkeeping principles. Every business transaction creates balanced Journal Entries consisting of equal Debits and Credits.
Unlike standalone accounting tools like QuickBooks or Wave, Odoo connects accounting directly to operational events: validating a Sales Order posts to Accounts Receivable, receiving inventory posts to Uninvoiced Stock Accounts, and validating a Vendor Bill posts to Accounts Payable — eliminating manual journal entries.
Step 1: Fiscal Localization Package Setup
Fiscal Localization defines default account codes, tax rates, financial statement structures, and legal invoice formatting for your country.
Navigate to Accounting Settings
Go to Accounting > Configuration > Settings.
Select Fiscal Country Package
Under Fiscal Localization, select your primary country (e.g., United States – GAAP, United Kingdom, Canada, Australia, Germany, or Generic Chart of Accounts).
Save & Auto-Initialize
Click Save. Odoo automatically populates hundreds of standardized account codes, default sales taxes, and statutory financial report templates.
Step 2: Designing & Importing Chart of Accounts
Go to Accounting > Configuration > Chart of Accounts. Accounts are organized by numeric series and Account Types:
| Code Series | Account Category | Account Type in Odoo | Example Account Name |
|---|---|---|---|
101000 |
Current Asset | Bank and Cash | Main Operating Bank Account |
121000 |
Current Asset | Receivable | Accounts Receivable (A/R) |
211000 |
Current Liability | Payable | Accounts Payable (A/P) |
400000 |
Operating Revenue | Income | Product Sales Revenue |
600000 |
Operating Expense | Expenses | Rent & Utilities Expense |
To import custom accounts, format your CSV file with headers: code, name, user_type_id/name, reconcile.
Example line: 101200, Chase Savings Account, Bank and Cash, TRUE.
Step 3: Configuring Accounting Journals
In Odoo, every transaction must belong to a Journal. Go to Accounting > Configuration > Journals:
- Customer Invoices Journal (Sales): Records all outbound billing to clients
- Vendor Bills Journal (Purchase): Records incoming supplier invoices
- Bank Journals: Dedicated journal per bank account with short code (e.g.
BNK1) - Cash Journal: Tracks petty cash transactions
- Miscellaneous Operations: For opening balance adjustments and manual depreciation entries
Step 4: Setting Up Sales & Purchase Taxes
Navigate to Accounting > Configuration > Taxes. Click New to configure custom tax rates:
Tax Name: State Sales Tax 8.25%

Tax Type: Sales

Tax Computation: Percentage of Price (8.25%)

Tax Account (Invoices): 251000 Tax Received Liability Account

Tax Account (Credit Notes): 251000 Tax Received Liability Account
Step 5: Customer Invoicing & Accounts Receivable (A/R) Workflow
Create Customer Invoice
Go to Accounting > Customers > Invoices > New. Select Customer, Invoice Date, Due Date, and add Line Items with price and tax.
Confirm Invoice
Click Confirm. Odoo generates the underlying balanced accounting entry:
• Debit: 121000 Accounts Receivable ($1,082.50)
• Credit: 400000 Product Sales Revenue ($1,000.00)
• Credit: 251000 Tax Received Liability ($82.50)
Register Payment
When the client pays, click Register Payment, choose Bank Journal, and click Create Payment. Odoo debits Bank and credits Accounts Receivable.
Step 6: Vendor Bills & Accounts Payable (A/P) Workflow
- Go to Accounting > Vendors > Bills > New
- Upload PDF or type Vendor name, Bill Date, and Bill Line items
- Click Confirm (Debits Expense Account, Credits
Accounts Payable 211000) - Use Batch Payments to pay multiple vendors simultaneously via SEPA XML or Check printing
Step 7: Analytic Accounting & Cost Centers
Odoo Analytic Accounting allows tracking profitability by project, department, or cost center without ballooning your Chart of Accounts:
- Enable Analytic Accounting in
Accounting > Settings - Create Analytic Plans (e.g., Projects, Departments)
- Tag invoice lines or vendor bills with Analytic Accounts to view real-time project profitability reports
Step 8: Financial Reporting & Audit Trail
Odoo provides dynamic financial statements with full drill-down capabilities:
- Balance Sheet:
Reporting > Balance Sheet(Real-time Assets, Liabilities, Equity) - Profit & Loss:
Reporting > Profit and Loss(Gross Margin, Operating Expenses, Net Income) - General Ledger:
Reporting > General Ledger(Detailed transaction journal log) - Audit Trail: Click any line item in reports to inspect the original invoice, bill, or source document instantly
zSmartFix Editorial Team
Step-by-step technical guides tested on real hardware. Our guides are independently written and freely accessible to everyone.
Leave a Reply